
Post 43: Easy Homemade Holiday DIY and Decorations | Addobbi Fai Da Te Semplici E Di Effetto Per Natale
DIY Holiday Decorations
Here are a few easy pine cone ornaments you can do from home that look great and won’t cost you and arm and a leg this holiday season!
- - -
Ecco alcuni semplici ornamenti che potete realizzare a casa con le pigne: si presentano molto bene e non costano un occhio!

Pine cone prep
Pine cone prep:
To clean and prepare freshly picked pine cones for crafting you will need to bake them. This will dry out the sap and kill any bugs living inside.
1. Preheat oven to 130-150 degrees Celsius (about 275f)
2. Cover a baking sheet with aluminum foil and parchment paper to collect anything that may fall and keep your oven clean.
3. Bake for 1 hour, then turn off oven and let them sit inside for another hour.
*Don’t forget to check on the pine cones occasionally to make sure you are not burning them.
*Ps the house will strongly smell of pine after this.
- - -
Preparazione delle pigne:
per pulire e preparare le pigne appena raccolte da usare per le lavorazioni, dovete cuocerle nel forno. In questo modo si asciugherà la resina e si elimineranno eventuali insetti all’interno.
1. Presiscaldate il forno a 130-150 gradi
2. Coprite la carta da forno con un foglio di alluminio e della carta da cucina in modo da raccogliere tutto ciò che potrebbe cadere dalle pigne in modo da tenere pulito il forno.
3. Cuocete per 1 ora, poi spegnete il forno e lasciate le pigne dentro per un’altra ora.
*Non dimenticate di controllare le pigne ogni tanto per vedere che non stiano bruciando.
*Dopo la cottura in casa si sentirà un forte odore di pino.

Pine cone Wreath
What you will need:
Pine cones
Plastic or Paper plates (or some type of base to build off of.)
Cardboard or Brown Paper
Little Berries & Nuts
Ribbon (for bow)
Hot Glue Gun
1. Cut a hole in the plate and wrap it in cardboard. (This will make the pine cones easier to attach and hide the white plate, which would otherwise stick out.)
- - -
Ghirlanda Di Pigne
Avrete bisogno di:
Pigne
Piatti di plastica o di carta (o qualcosa di simile per la base)
Cartone o carta marrone
Bacche Rosse (finte) e Ghiande
Nastro (per il fiocco)
Pistola per colla a caldo
1. Tagliate un buco nel piatto e avvolgetelo con il cartone. (questo renderà più semplice incollare le pigne e nasconderà il bianco che altrimenti si vedrebbe)

2. Use your hot glue gun to adhere the pine cones to your base.
- - -
2. Usate la pistola per incollare le pigne alla base
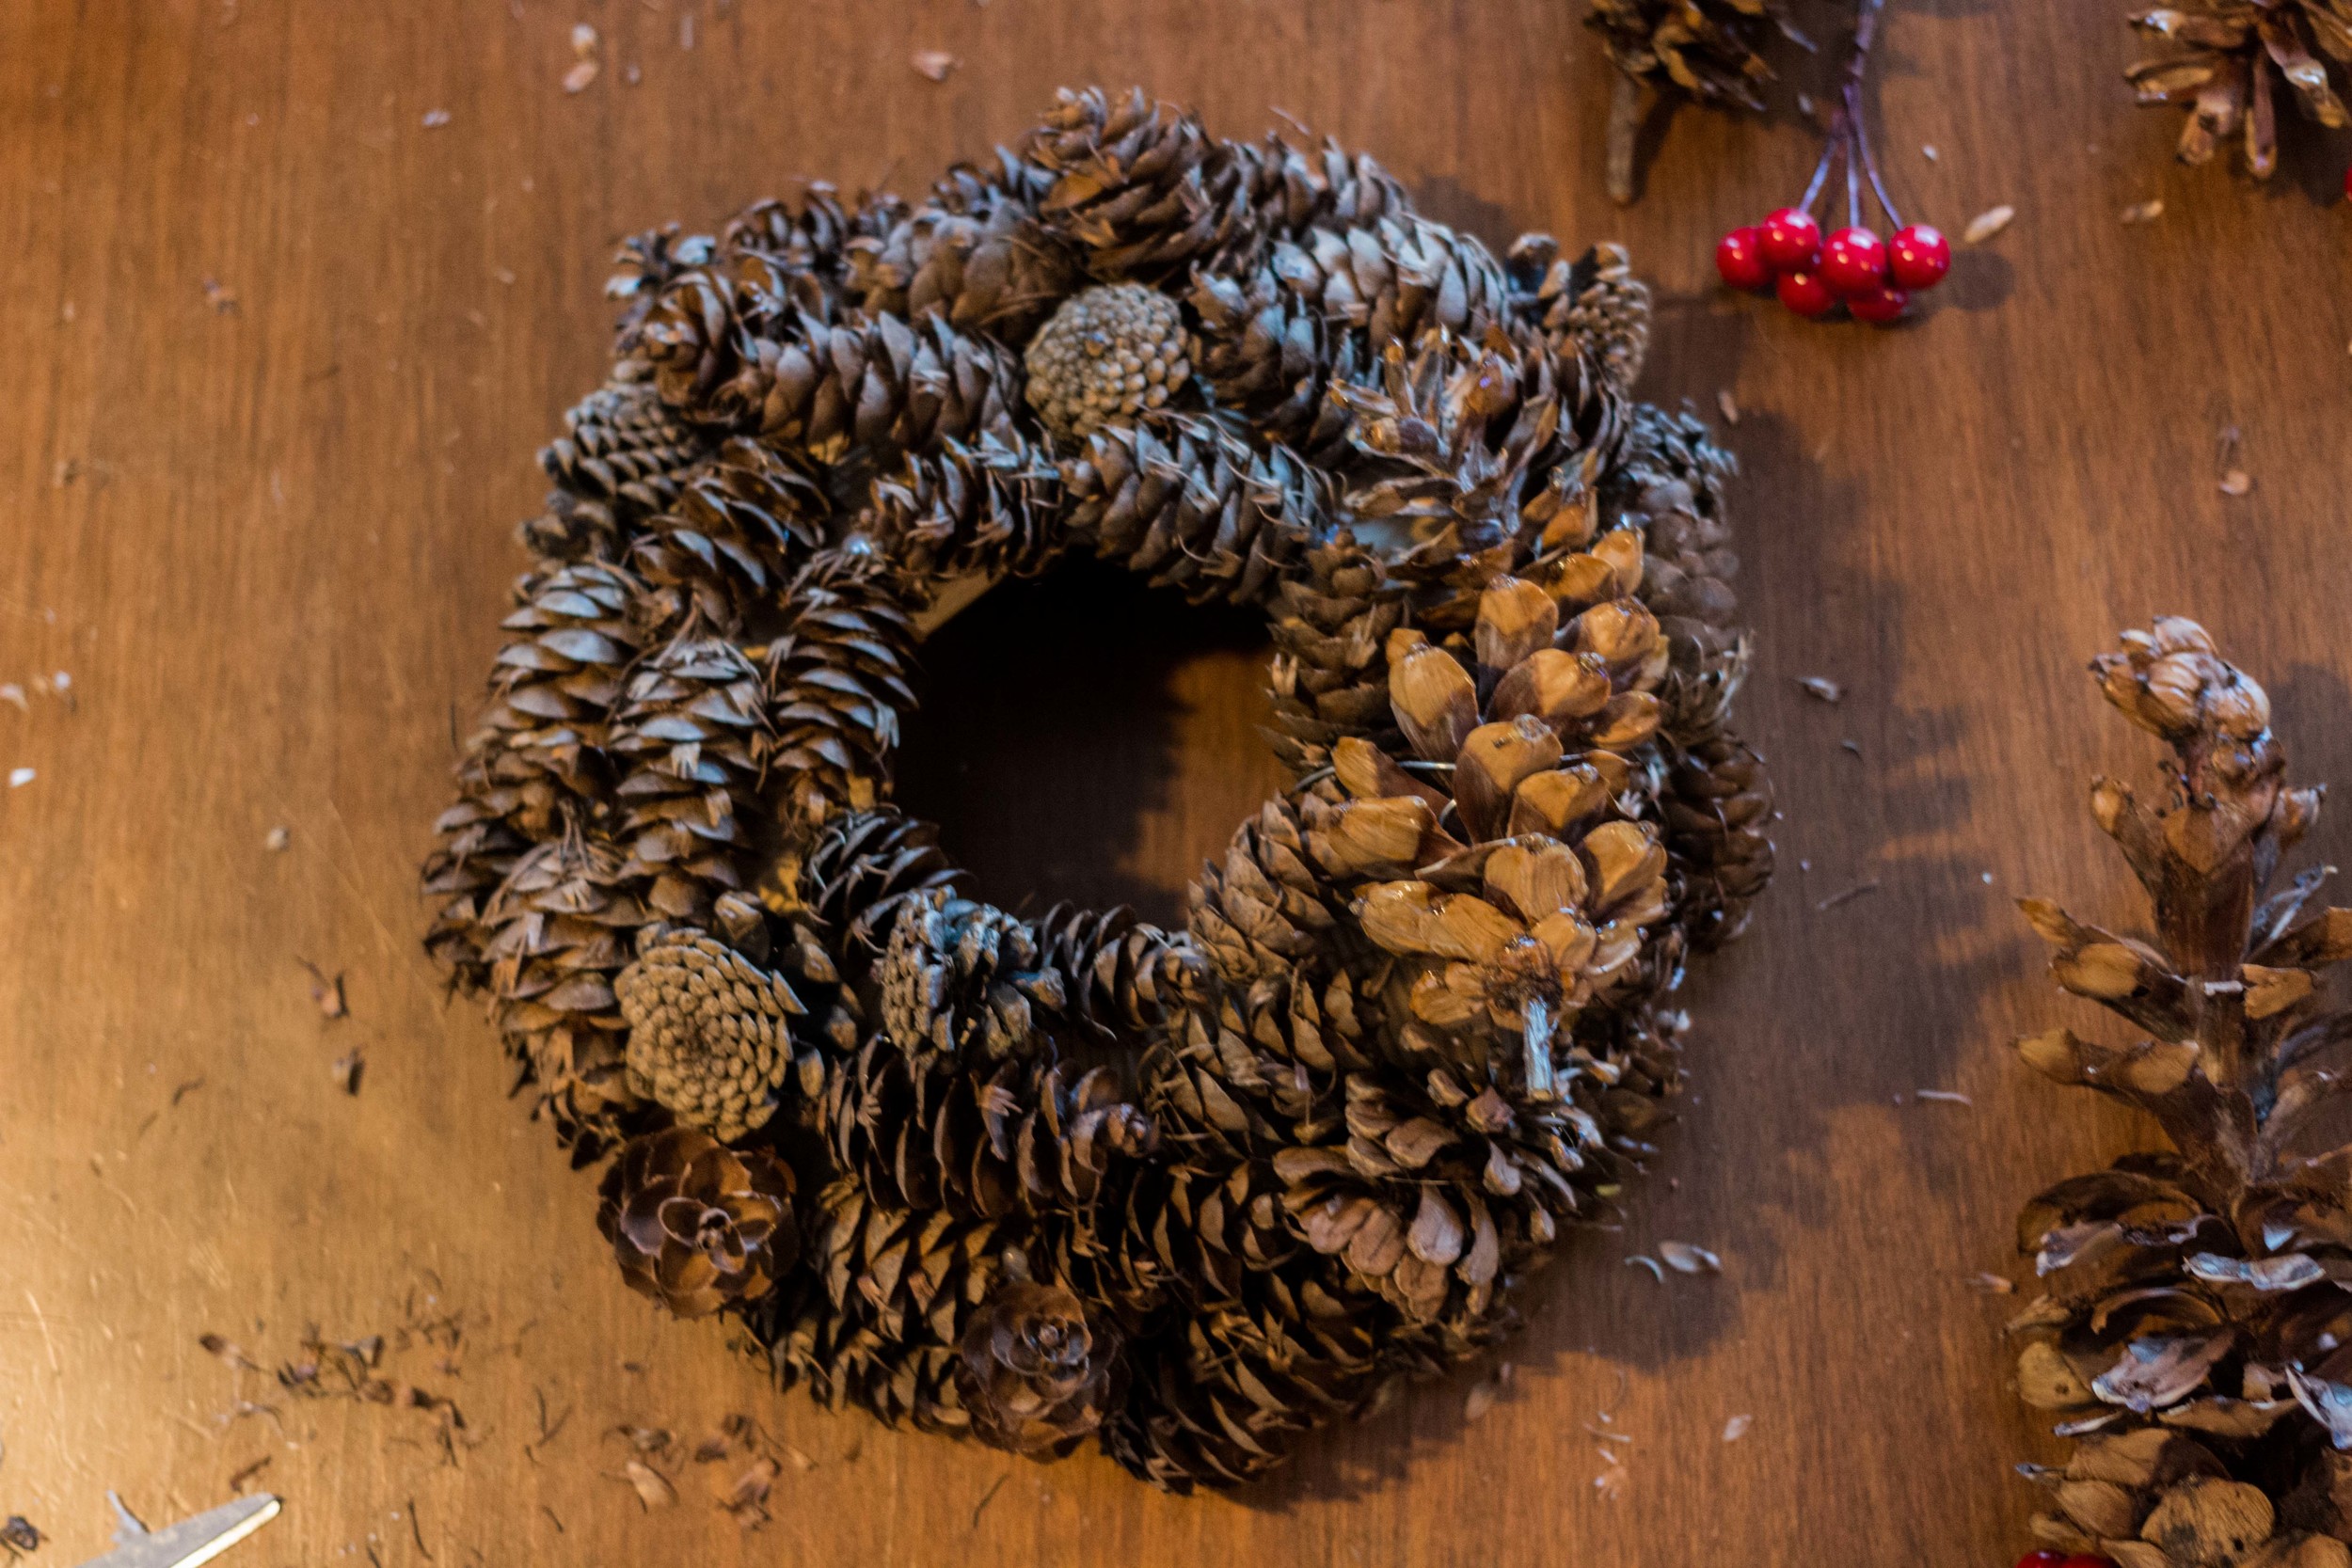

3. Add berries and nuts to cover any holes and decorate your wreath.
4. Add bow and enjoy.
- - -
3. Aggiungete le bacche e le ghiande per riempire i buchi e abbellire la vostra ghirlanda
4. Aggiungete il fiocco

Giant Pine cone Ornament
What you will need:
Pine cones (a lot)
Styrofoam Ball(s)
Ribbon
Bow
Berries and Nuts
Glue Gun
1. Glue the pine cones one by one covering as much of the ball as you can. Once half or more of the ball is covered, add the ribbon that will hold up your ornament. (You may need to cut the bottom of last pine cone to make it fit.)
2. Add berries and/or nuts to fill in any holes that may show & to decorate. Add bow and enjoy.
- - -
Grande Sfera Di Pigne
Avrete bisogno di:
Pigne (molte)
Palle di polistirolo
Nastro
Fiocco
Bacche Rosse (finte) e Ghiande
Pistola per colla a caldo.
1. Incollate le pigne una ad una cercando di coprire la palla di polistirolo il più possibile. Una volta coperta circa metà della palla, aggiungete il nastro che servirà da supporto. (potreste aver bisogno di tagliare la base dell’ultimapigna per poterla inserire)
2. Aggiungete le bacche e le ghiande a piacere /o per riempire tutti i buchi rimasti. Aggiungete il fiocco.


Fabric Ornament
What you will need:
Approximately 1 Meter of fabric
Styrofoam Ball
Ribbon
Glue Gun
1. Cut pieces of fabric to desired length and width. (Mine where around 5.5cmx1.5cm)
2. Fold Fabric pieces in half and glue the folded corner to the ball, repeat until ball is 95% covered.
3. Glue the piece of ribbon that will support your ornament and finish adding the fabric pieces.
4. Shake the ball to fluff it up and enjoy!
- - -
Ornamento Di Tessuto
Avrete bisogno di:
1 metro circa di tessuto
1 palla di polistirolo
Nastro
Pistola per colla a caldo
1. Tagliate il tessuto in pezzi della lunghezza e larghezza desiderati. (i miei erano circa 5.5cmx1.5cm)
2. Piegate le strisce di tessuto a metà e incollate il bordo piegato alla palla di polistirolo. Ripetete fino a quando il 95% della palla sarà coperto.
3. Incollate la parte di nastro che servirà da supporto per il vostro ornamento e finite di aggiungere le strisce di tessuto
4. Scuotete la palla per renderla più gonfia!


Pine cone Ornaments
What you will need:
Pine cones
Ribbon
Glue Gun
1. Attach the ribbon that will support your pine cone to the bottom of the cone.
2. Add bow and enjoy!
- - -
Pigne Ornamentali
Avrete bisogno di:
Pigne
Nastro
Fiocco
Pistola per colla a caldo
1. Incollate il nastro che farà da supporto alla base della pigna
2. Aggiungete il fiocco

